Cutting the Cord Server Guide – Part One: Laying the Foundation
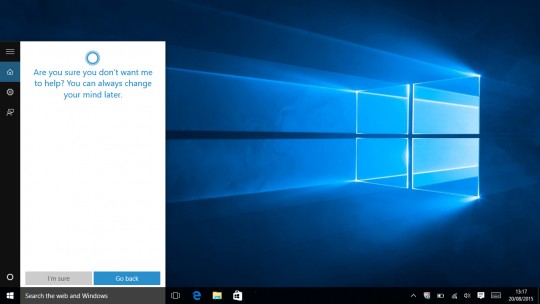
With your fresh install, you are most likely looking at a screen similar to this wondering what you are going to do now.

First thing we need to do is to lay the groundwork so that everything we do later will work properly. In this phase of the guide, we are going to do the following:
- Setup a static IP for your server
- Setup port forwarding for your router
- Make sure your computer never goes to sleep
- Make sure your server always logs in when it reboots
- Install TeamViewer (Optional but highly recommended)
Set Up a Static IP
Right now your computer is set to use something called DHCP. Without getting technical, that basically means your computer’s address changes every time it reboots or gets disconnected. We need your computer to have the same address at all points in time so we can access it remotely and the various programs know where to look.
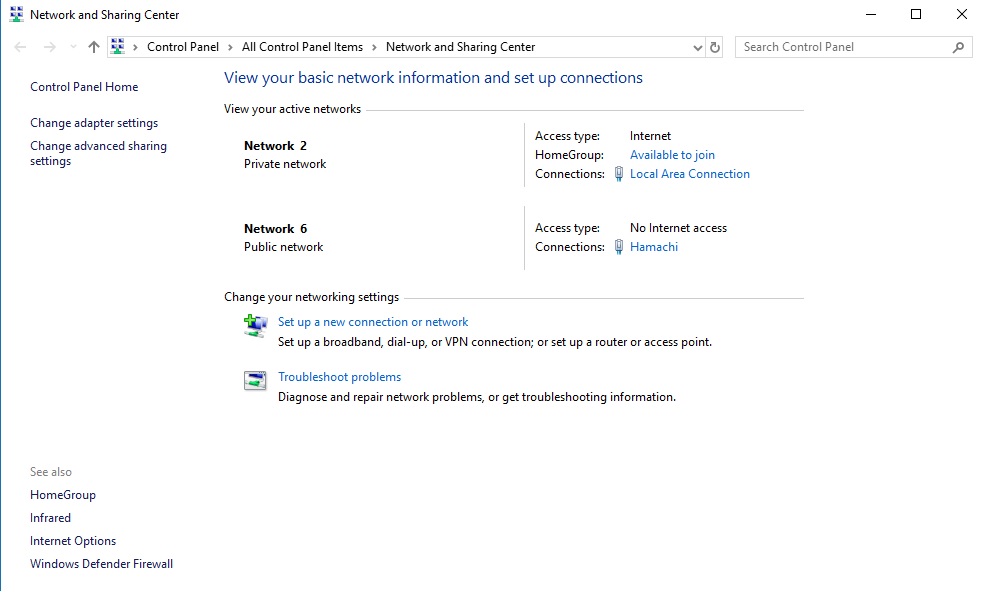
First thing we need to do is access the Network and Sharing Center. Right click on your network icon in the lower right of the system tray and choose Open Network & Internet settings. On this new window you will now want to scroll all the way down and click Network and Sharing Center. When you do, you should see something that looks like the following window appear.

You will most likely only see one network. The second network you see here (Hamachi) can be ignored for now, it may be discussed in the advanced/miscellaneous guide section. Now click your adapter name next to Connections on the right hand side of the window and a network status window will appear. Click the Details button.
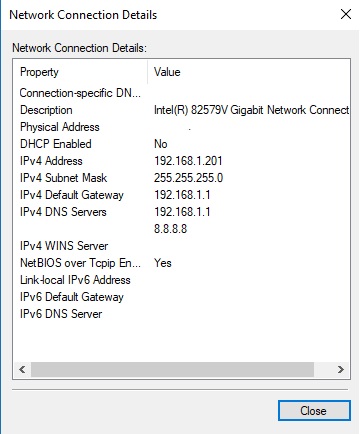
 Your details will probably look slightly different, but that is alright. There are a few numbers you need to write down from this window. Write down the IPv4 Address, the IPv4 Subnet Mask, the IPv4 Default Gateway, and the two IPv4 DNS Server numbers. Once you have all of those numbers written down, you can close this window.
Now click on Properties. At the window that pops up, select Internet Protocol Version 4 (TCP/IPv4) and click Properties.
 The window to the right should appear. Click the bullet for Use the following IP address. In the IP address field, copy the first 3 sets for numbers that you had written down for the IPv4 Address. For the last set choose a number greater than 2 but less than 100, typically I choose 50 but it can be anything. Therefore I would enter in the IP address field to the left 192.168.1.50. For the Subnet mask and Default gateway, enter the exact same value you have written down.
Click the radio button for Use the following DNS server addresses. Enter the two values you recorded earlier. If for whatever reason you only had one server listed previously, you can enter 8.8.8.8 for the alternate DNS server. Click the check box for Validate settings upon exit and then click OK. If everything goes well, the network trouble shooter will pop up and do a quick scan and then find nothing wrong. We now have a dedicated internal IP for your server and its on to the next task
Set Up Port Forwarding
Port forwarding is a very important step, unfortunately I can’t help much as it all depends on your router. I’ll do my best to go through the steps, but you may have to find a similar location on your own router. For reference I have a Linksys router.
The first step you need to take is to log into your router. In a web browser, type in the number you wrote down for the Default Gateway. In my case that’s 192.168.1.1. You should now see a login screen. Login to the router. If you never changed the router password and you don’t know it, do a google search for your brand of router and default password. You should be able to find the default password. Once logged in, you need to find the settings for port forwarding. On my Linksys router you need to go to Security, click the Apps and Gaming Tab, and finally Single Port Forwarding.
We are going to add the following five lines to your port forwarding table
Port Forwarding Ports
| Application | External Port | Internal Port | Protocol |
|---|---|---|---|
| PLEX | 32400 | 32400 | TCP |
| SABnzbd | 38080 | 38080 | TCP |
| Deluge | 38081 | 38081 | TCP |
| Sonarr | 38082 | 38082 | TCP |
| Radarr | 38083 | 38083 | TCP |
There will be at least one additional column titled Device IP (or something similar). Place the Static IP you created in the above step in this column. Make sure your port forwarding is saved (your router may need to reboot). Congratulations, if you made it here you just completed the hardest step.
Adjust Power Settings
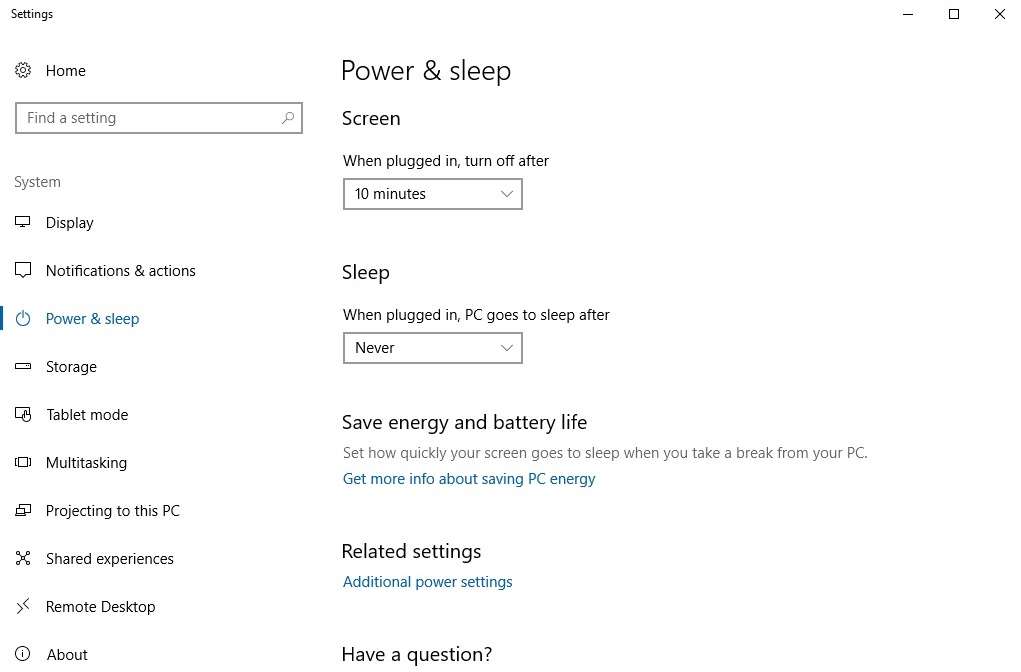
We now need to adjust the power settings of the server to make sure it never goes to sleep. If it does go to sleep, it will miss downloading shows when they become available and can even prevent you from accessing it. In order to access the power settings, right click on the start menu and select Power Options. You should see a window similar to what appears below. Make sure you set the options under sleep to Never. You can set the screen options to whatever you prefer. You may not even need a monitor attached in the end.

Make the Server Login at Startup
If your server does reboot (like for a pesky windows update), you need to make sure the computer automatically logs in and isn’t waiting for an input. In order to set your server to login automatically you need to hit Windows key + R. In the run window type netplwiz and hit OK. Uncheck the box that says Users must enter a user name and password to use this computer. Press OK.
Install TeamViewer (Optional)
This last step is optional but I highly recommend it. TeamViewer is an application that allows you to remotely access and control your server. Its through applications like this that I don’t truly need a monitor. TeamViewer is free for personal use. Start by downloading TeamViewer from their website. During the installation process, make sure you select Installation to access this computer remotely (unattended). When installation is complete, it will automatically start the Unattached access configuration. Press Next to begin, and then enter a Computer name and Password. The next step is to create a TeamViewer account. This is optional, but makes it so you don’t need to memorize a 9 digit number to connect to your PC.
And we are now done laying the foundation. Our next post will go briefly into storage options for your server before we finally start talking about Newsgroups. Until Next Time
Prev: Introduction – What Can Cord Cutting Do For YouNext: Server Guide Part Two – Let’s Talk About Storage