Cutting the Cord Server Guide – Part Two: Let’s Talk About Storage
Before we move on to the real guts of your server, we need to talk briefly about how you are going to store your media. There are three options for storage.
Option 1: Store Your Media on Your Current Drive
There isn’t much to say about this method. You simply use your current drive that contains everything else. Typically you are using this method if you are using an old computer or your general use computer for your server. The only thing you have to think about is how you want your folders structured. Setup is easy. All you need to do is create a few folders in a location you prefer. This method is the least preferred.
Option 2: Use a Dedicated Hard Drive
This is a step up from the first option. In this option you have a separate hard drive that is only used to store your media. This allows you to keep things neat and clean. You also won’t have to worry about something else taking up your disk space. Setup for this is easy as well. Just make sure your drive is clean and formatted and then create a few folders that will be discussed shortly.
Option 3: Setup and Use a Storage Space

Storage spaces allow you to combine multiple physical hard drives of the same size into a single hard drive. It also has the ability to give you redundancy so that in case one of your hard drives fail, you still have all of your data. This is the method that I recommend although they are a little bit more complex to set up.
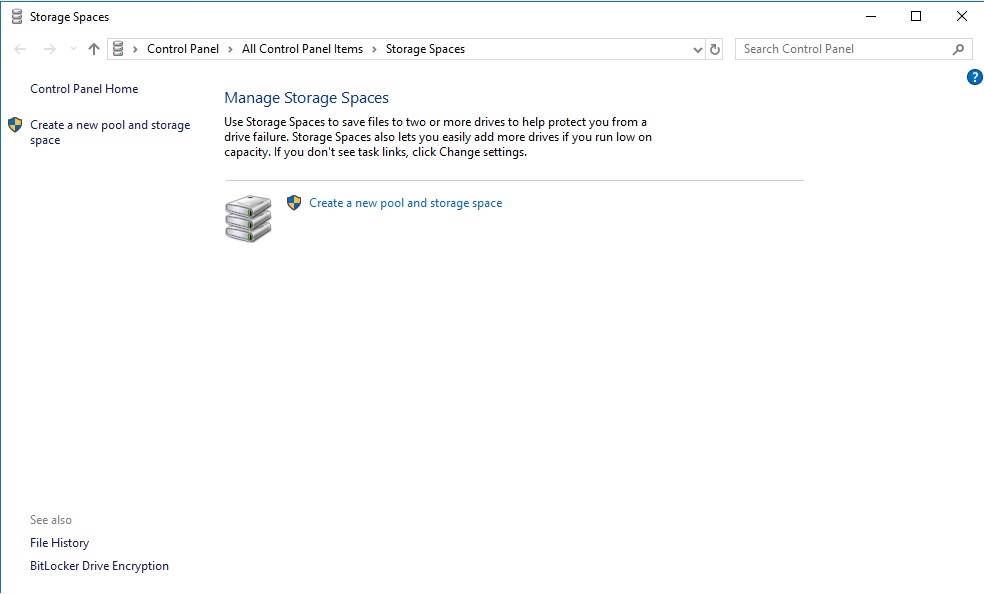
In order to setup storage spaces, right click on your Start Button and select System. In the resulting window, select Storage. Finally, select Manage Storage Spaces near the bottom of the screen and the above window will open.
From there you need to select Create new pool and storage space. You may receive a message which asks if you want to allow this program to make changes to your computer. If you do, just select yes. You now should see a list of drives. Select the ones you wish to add to your new storage space. As a warning, any data on the drives being used in a storage space will be erased during the creation process. Once you’ve selected your drives, click Create pool. In the next window, give your storage space a drive letter and a name.
 You then need to choose a storage layout. This is where you determine the redundancy of your storage space. You have three options:
- Simple (No Resiliency) – This method uses the maximum amount of space on your drives for storage. The plus side of this is you don’t waste any space. The downside of this is that if one of the drives fail you could lose everything.
- Two-Way Mirror – This method requires an even number of physical drives. This method records all of your data twice so if one of your hard drives fail, you haven’t lost any data. The downside to this method is that your available storage space is actually cut in half.
- Parity – The third method requires a minimum of three physical hard drives. Without going into details, this method uses one of the hard drives to back up the rest. This is the best compromise between the two other methods and is the method I recommend.
Once you’ve chosen your storage layout the last step is to select a maximum size. Select any size that is larger than your total drive size. If your data starts approaching your physical drive size, you sill start to receive warnings that you need to add more drives. This value can be changed later so don’t get hung up on it. Once you’ve chosen a size, click Create storage space. Provided everything went right, you should see the following window. You can close this window because you’ve successfully created your storage space.
Finishing Up
The final step in setting up your media storage is to create two folders. Regardless of which option above you chose, go to your root directory. This would be whatever folder you chose to store things if you went with Option 1 or the drive if you went with option 2 or 3. Once there create a folder named Movies and a folder named Television. We now have our storage area set up and can finally get to the meat of your server.
Prev: Server Guide Part One – Laying the FoundationNext: Server Guide Part Three – Newsgroups, NZBs, and SABnzbd
