Cutting the Cord: Server Guide – Part Eight: The Almighty PLEX
We are on the home stretch. We have a server which will find all of the television shows and movies that we are looking for, download them, sort them and rename them. All we have left is to make so we can access our media from wherever we want. That is where PLEX comes in.
What is PLEX and how do I get it?
PLEX is a piece of software we will install on our server that will allow us to stream the media to any other device running PLEX, anywhere in the world. We will start by downloading PLEX Media Server from https://www.plex.tv/media-server-downloads/. Once downloaded, open the file and click the Install button. The installer is pretty basic so you shouldn’t have any issues. When it completes, click the Launch button.
PLEX will now ask you to create an account. You can create the account anyway you please. You can choose to link it to your Google account, your Facebook account, or you can choose to create an account via just your email account. Once the account is created, you can click Got It on the next screen. PLEX will then ask you about Plex Pass. Just click the X in the upper right to close the window as you do not need this. You should now be at a screen that says Server Setup as seen below. Like all of our other apps we now have some setup to do.
Setting up PLEX

First thing we need to do is to name our server. Choose any name you like. This is just a name to help you identify your server. While not strictly necessary, if you have any want to watch your media from outside your home network, you must check the box that says Allow me to access my media outside my home. Click Next when you are done.
You now need to tell PLEX where your media is stored. If PLEX currently shows any libraries, go ahead and click the red X next to them to remove them. PLEX will ask you to confirm, so click the red Delete button. PLEX will then give you an ominous message about this action not being able to be undone. It’s ok. Click the red Yes, I’m Sure button.
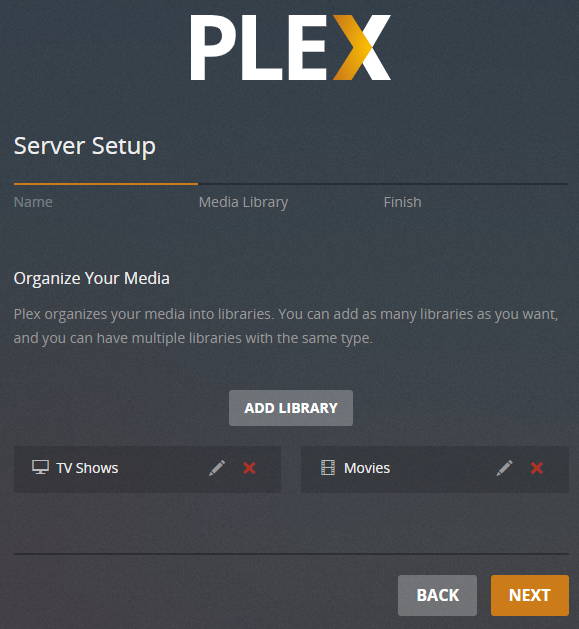
We now should have a blank slate as far as our PLEX library is concerned. Click the Add Library button. Select Movies and click Next. Now click Browse for Media Folder and search for your Movies folder, in my case it’s D:\Movies. Once you’ve selected your movie folder, click the Add button and then click the Add Library button. Repeat these steps selecting TV Shows in order to add your TV Shows library. When complete, your screen should look as follows, and you can click Next.

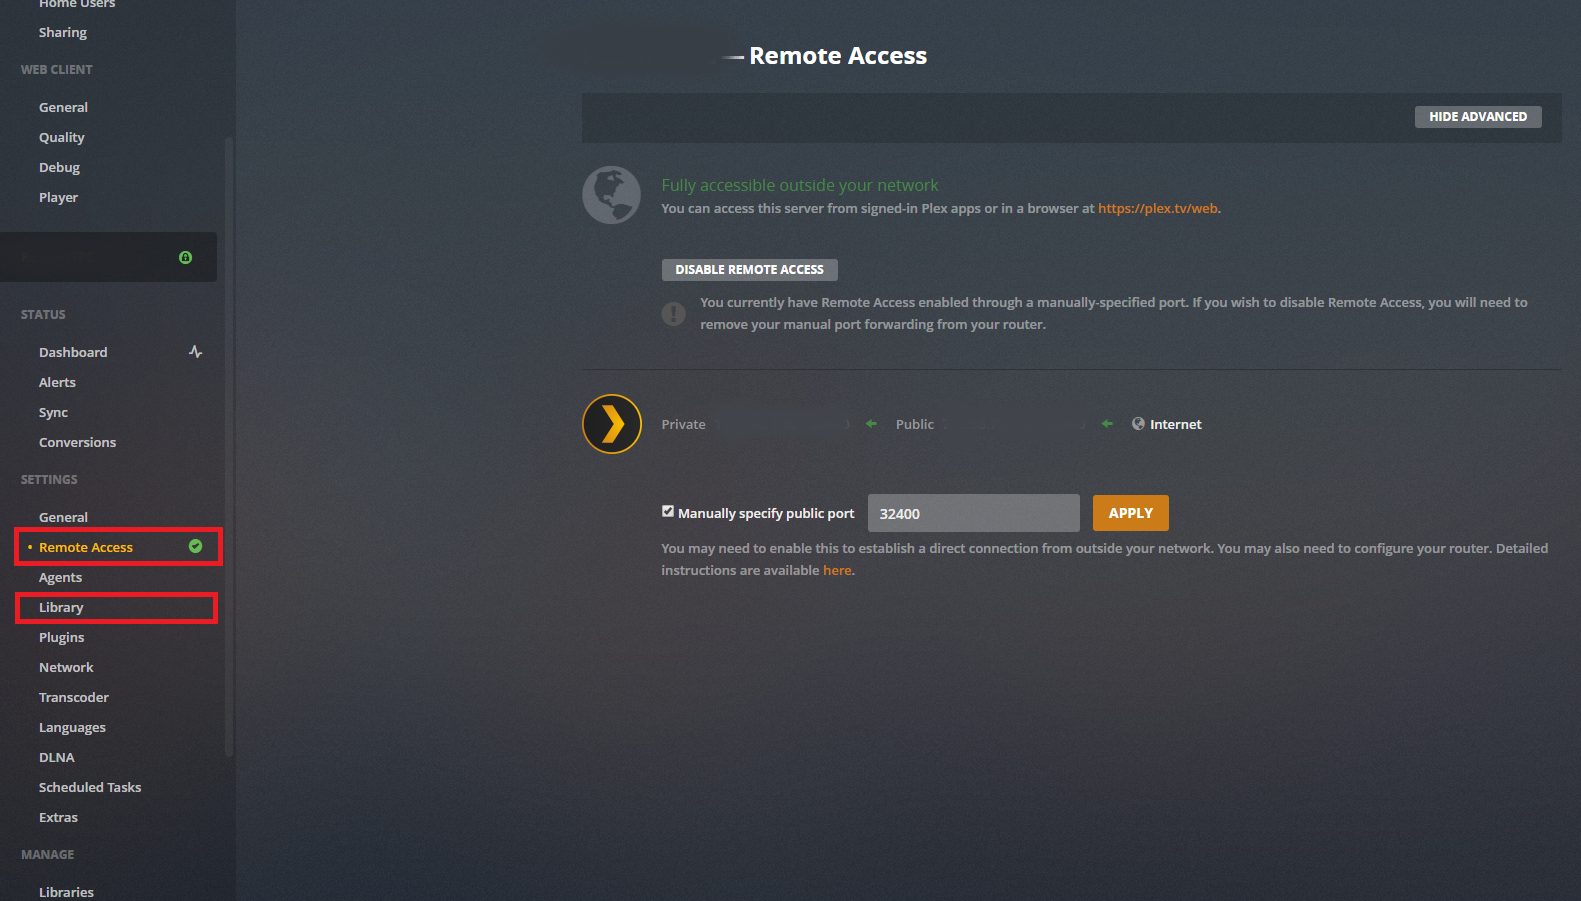
You can then click Done. You should now be in the main PLEX screen. If you currently have media downloaded you will see some of it here. In the upper left you should see the name of your server you entered earlier. We just have a few more things we need to set up. On the left hand side click the Settings button next to the gear icon. Down on the left you need to click the Remote Access button.

Make sure that Manually specify public port is checked and set the port to 32400. Now click the Library menu button and make sure Scan my library automatically is checked. One last item to take care of and that is languages. Click the Languages settings button and make sure Automatically select audio and subtitle tracks is checked. Make sure Subtitle mode is set to Shown with foreign audio. That’s it we are done setting up your server.
So what now?
Now that everything is setup how do I watch what I downloaded? The simple answer is through the PLEX app. If you have a Fire TV or other smart TV box (such as Apple TV or Roku), simply download the PLEX app to the device, log in and you are all set to watch your media. Now you’re thinking “I thought you said I could watch my media anywhere?” Well, you can. The PLEX app also exists as an android or iphone app. Simply download the app and you are all set (There is a small one time fee to activate the mobile versions of the app). Furthermore, whenever I travel, I throw a Fire TV stick into my suitcase. I simply connect it to the internet where ever I am and I can watch my TV and movies from my hotel room.
Also, let’s say someone tells you about a TV show you want to check out but you aren’t home. Simply pull out your phone, go to http://YOUR_PUBLIC_IP_ADDRESS:38082 and you will find yourself at Sonarr ready to add your show. With any luck it will be downloaded by the time you get home. Similarly, the other apps can be reached at
- SABnzbd: http://YOUR_PUBLIC_IP_ADDRESS:38080
- Deluge: http://YOUR_PUBLIC_IP_ADDRESS:38081
- Radarr: http://YOUR_PUBLIC_IP_ADDRESS:38083
Where do we go from here?
This is the end of the server guide. My intentions are to start writing about the hardware you may be interested in, particularly if you want live TV broadcasts or the ability to play games from your server. Until next time, happy cord cutting.
Prev: Server Guide Part Seven – Coming in Hot, Setting up Your Radarr