Cutting the Cord Server Guide – Part Five: Setting up Sonarr
So now we have a server set up and it will download via newsgroups and torrents. But how do we get the server to actually find the what you are looking for? That is where Sonarr comes in.
What is Sonarr and How do I Install it?
Sonarr (yes, it really has two ‘r’s) is basically like that DVR box you have from your cable company. It will search out for new episodes of shows you told it to look for, tells SABnzbd or Deluge to download it, and then manages them afterwards. It also has some other great features like upgrading from standard definition to high definition as it becomes available.
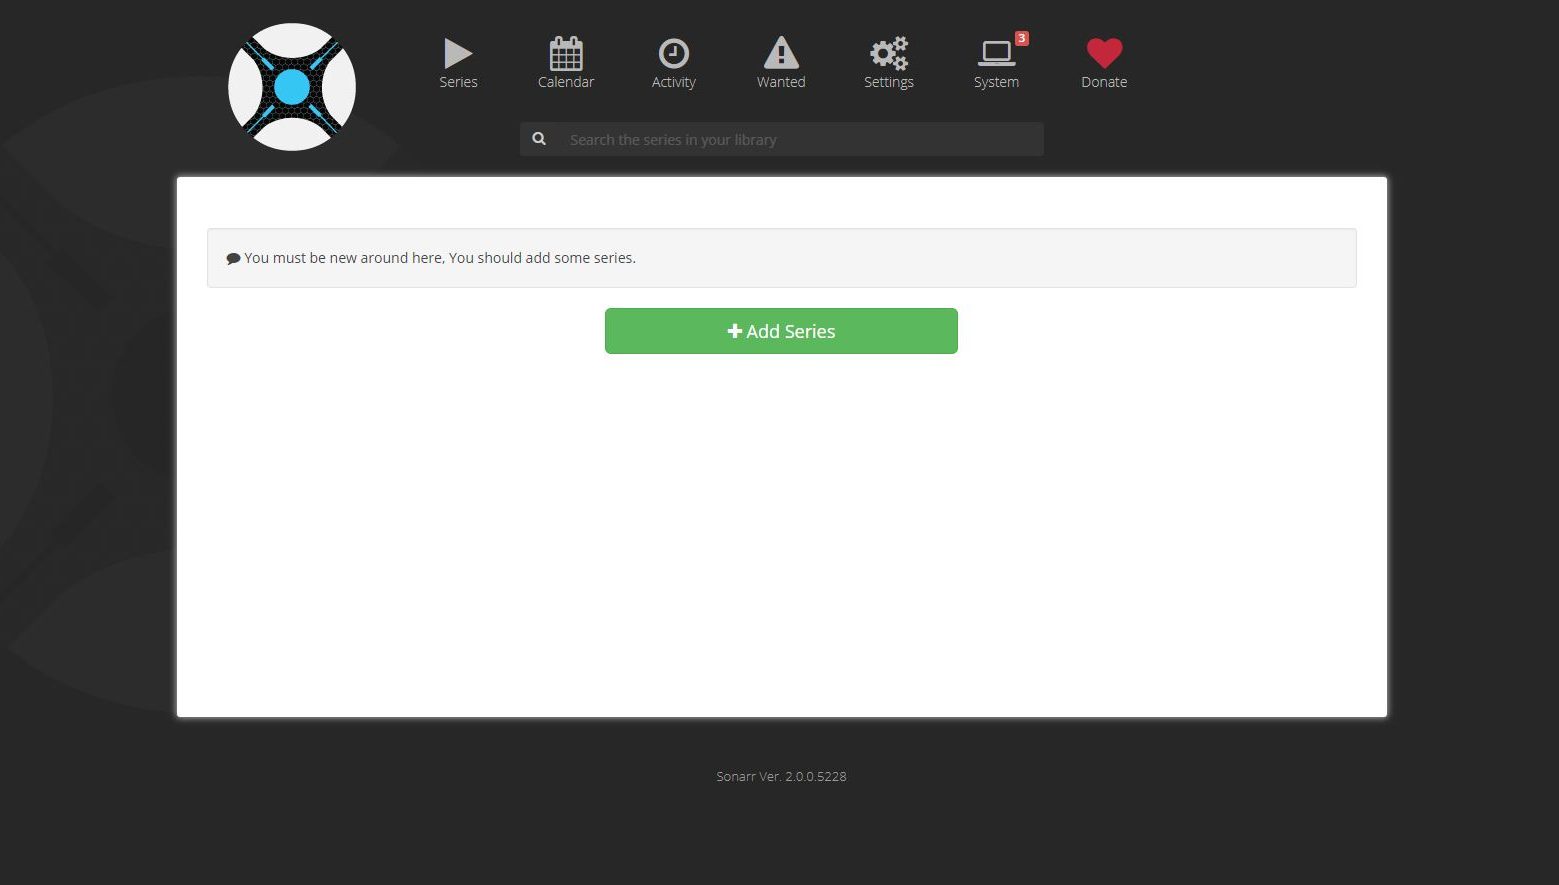
The first thing we need to do is download Sonarr from their website, here. Once downloaded, open the file and go through the installation. You should be able to just keep all of the default options. Make sure you leave Install Windows Service checked. Once the install is complete, open the Sonarr via the icon it should have put on your desktop. You should now see a screen that looks like this:

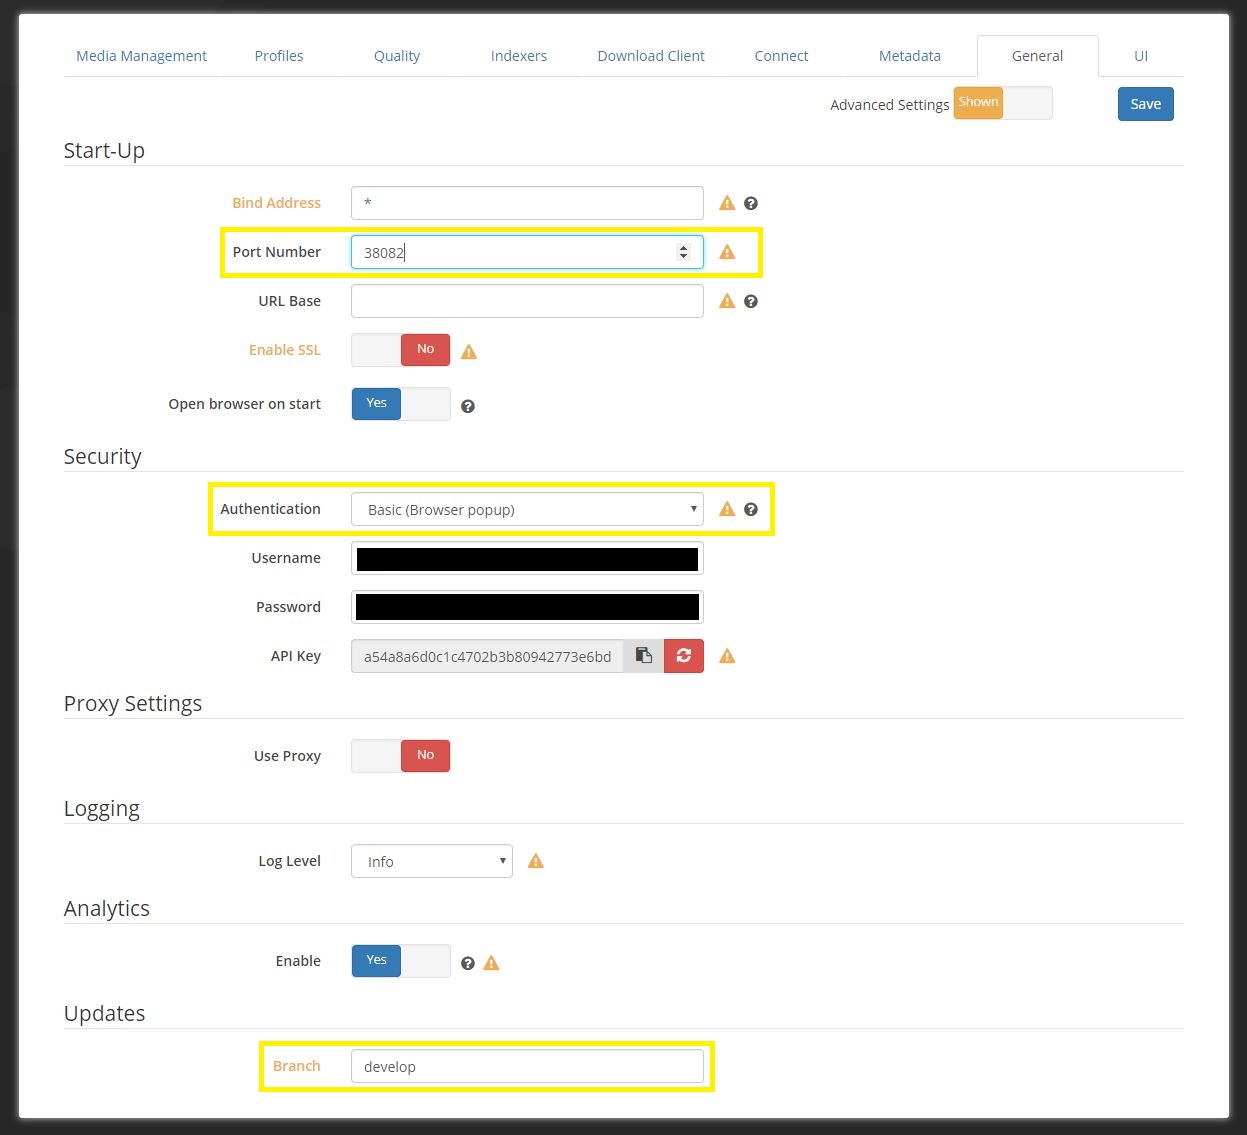
So before we can do anything with Sonarr we need to change some settings so it will work the way we want it to. So click the Settings button at the top of the screen. We need access to all of the setting options, so go to the general tab. Then switch Advanced Settings in the upper right from Hidden to Shown. Next make the following changes to the screen:
- Change the Port Number to 38082
- Change Authentication to Basic (Browser popup) and enter a user name and password
- Change Branch from master to develop
When complete your screen should look as follows. If it does you can click the Save button at the top.

Now that we’ve switched to developer mode, there is now a more updated version of the application we need. Click the System button at the top of the screen and then go to the Updates tab. You should see a list of different builds and the top one should have a blue button next to it that says Install Latest. Click this button and let it install. You should see a status in the lower right of the screen. When it goes away, Sonarr should be updated but because we changed the port you won’t see any changes. In order to access Sonarr now we need to go to http://localhost:38082/
Go there now and it should ask you for your login. Once you log in the screen should appear how we started. Go back to the System menu and click the Updates tab again. The blue button should now be green and now says “Installed.” Now that we have the current version, its time to change the settings. Click the Settings button at the top of the screen and you should be in the Media Management tab. Make sure Advanced Settings is still set to Shown and make the following changes:
- Switch Rename Episodes to Yes
- Change Season Folder Format to Season {season:00}
- Switch Create empty series folder to Yes
- Switch Ignore Deleted Episodes to Yes
Once complete we need to move to the Profile tab. This tab is mainly about your personal preference. There are six default profiles and you can create more if you want. For my use, I just use the default HD – 720/1080. If you want to create a new profile, click the Add button. Give your new profile a name and select which qualities are acceptable to download. After you’ve selected all the acceptable qualities you wish, select a cutoff. This is the level at which Sonarr will stop looking for a better quality. For example, if you want to download any quality as soon as its available but want to eventually get HD quality, you would select all of the qualities and set your cutoff to 720P.
Regardless of what you decide to do with quality profiles there is one thing we need to do on this page. At the very bottom you will see a section called Delay Profiles. The delay profiles allow you to set a delay before Sonarr starts looking. Click the wrench next to the profile listed and a new window should pop up. If you want to use only Usenet, set that in the Protocol line, else leave the first line alone. We are going to leave the Usenet Delay line set at 0. The Torrent Delay line tells Sonarr how long to wait before starting to download via torrents. I personally set this to 360 giving Sonarr six hours to find an episode on Usenet before looking on torrents. This number can be adjusted up or down as you prefer. Once complete, click Save.
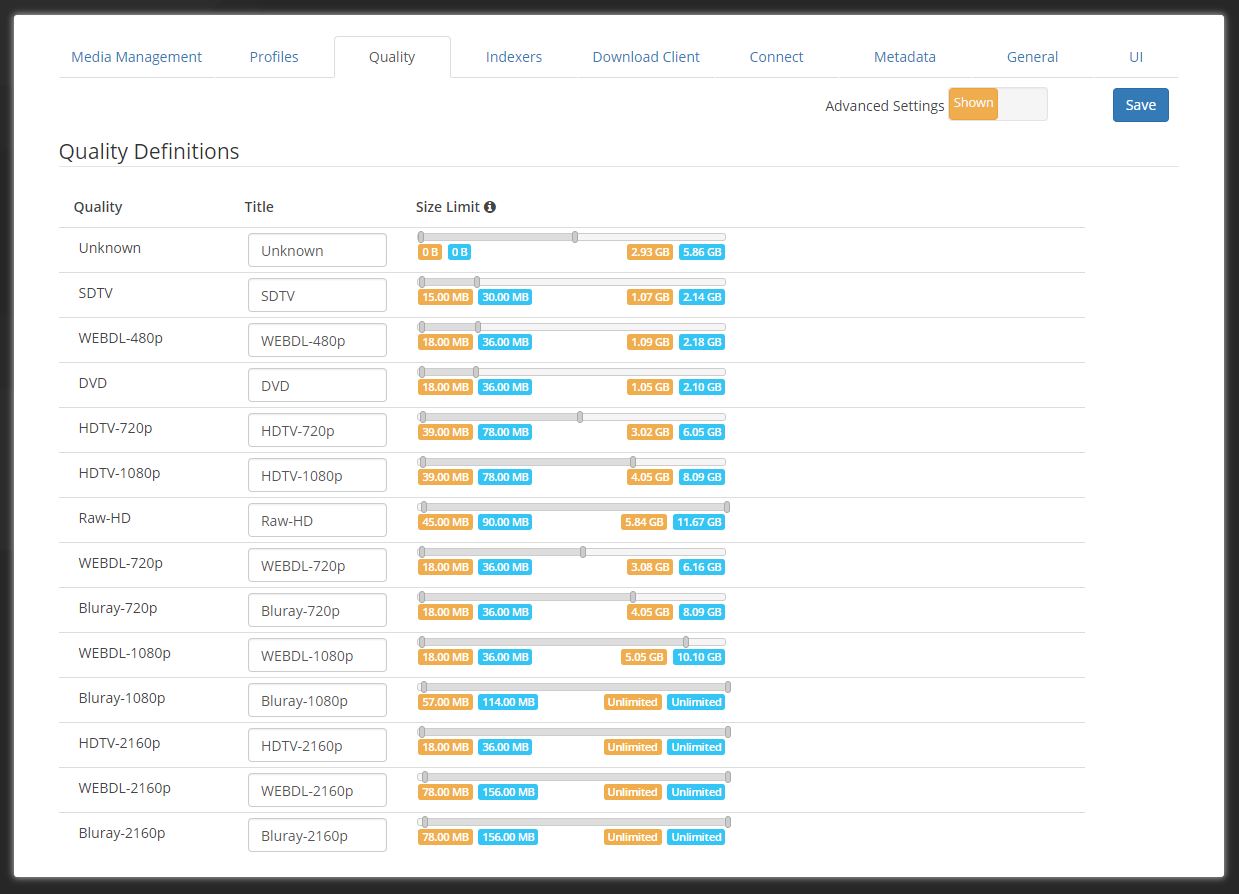
Its now time to move to the Quality tab. In this tab you will see several sliders where you can set a minimum and maximum value for file size of different qualities. See the image below for the values I use. Please note that you do not need to copy the numbers exactly. Just try to get them in the ballpark.

Once you’ve set your sliders, we will move on to the Indexers tab. This is the tab where we are going to enter all the indexer information we collected way back in part three. If you created the notepad file I recommended, open it now. Back on Sonarr, we are going to add our indexers
- Click the big plus icon to add an indexer
- Under Newznab, click the Preset button, if you see one of your indexers, click it. If you don’t see your indexer listed, click the Custom button instead
- If you are using a preset, the name and URL will already be filled out. If they aren’t filled out enter them now
- Add your API key that you noted in part 3 to the API Key line and then click Save
- Repeat these steps for each of your indexers
If you are choosing to use torrents click the plus icon one more time, click Rarbg, and then click Save. You are welcome to try using the other torrent trackers that Sonarr has access to, I just have no experience with them.
There are two more settings we need to make on this page. Change the Retention value to whatever your Usenet provider said it is. If you are using Newshosting, this value is 3281. Finally at the bottom of the page under Restrictions, click the little plus sign. Then paste the following text into the Must not contain field and click Save.
subfix,nfofix,Deleted.Scenes,DVDR.,DVDR-,EXTRAS.,xRed,ReEnc,FUNNY BiT
We are almost done. Move over to the Download Client tab. This is where you are going to tell Sonarr about SABnzbd and Deluge. Click the large plus icon and select SABnzbd. Then enter the following information.
- Name: SABnzbd
- Enable: Yes
- Host: localhost
- Port: 38080
- API Key: Get this value from the Config > General section of SABnzbd (http://localhost:38080/config/general/)
- Username: Whatever you set the SABnzbd user name to
- Password: Whatever you set the SABnzbd password to
- Category: sonarr
- Recent Priority: High
- Older Priority: Normal
- Use SSL: No
Press Save when done and then click the large plus icon again and this time select Deluge. Then enter the following information.
- Name: Deluge
- Enable: Yes
- Host: localhost
- Port: 38081
- Password: Whatever you set the Deluge password to
- Category: sonarr
- Recent Priority: First
- Older Priority: Last
- Use SSL: No
Press Save when done. We don’t need to make any other changes so just press Save in the upper right hand corner to save all the changes you made. Congratulations, your server now has the capability to automatically search and download new television shows and then automatically organize them. On the next installment, we’ll give a brief tutorial on how to use Sonarr.
Prev: Server Guide Part Four – Deluge of TorrentsNext: Server Guide Part Six – Down Periscope, Using Your Sonarr
Can’t get Deluge to connect using the suggested connections you offer. Unable to connect to host (using the localhost setting). The app is running. Where else would I look to find the correct setting for this? Thanks!
I have found sometimes localhost doesn’t work. Using your local IP address in place of localhost will often fix the issue.
The blue “Install Latest” button just says “Cannot install an older version” when you hover, and it doesn’t allow an install. FYI. I haven’t gotten far enough to know if that’s going to be important or not though
I know this is probably no longer useful, but I will be going through my entire guide in the next few days and updating it where necessary. Hopefully if there are any issues they will be resolved